Masking Technique

Tags

, , , ,

2016-03-30 13.25.29

Hi there,

March has finally gone, what crazy weather.

Thanks to everyone who entered last month’s Challenge.

This month’s Clarity Blog Challenge is a technique rather than a theme, the technique is masking. So go on give it a go, maybe the £50 clarity voucher will be yours.

Basically masking is as it implies, covering up, thankfully Clarity Stamps has been making masking for some of their stamps for a while now and it makes it so much easier to work with some of the more complex shapes.

Details of all Clarity Masks can be found http://www.claritystamp.co.uk/Information/Search

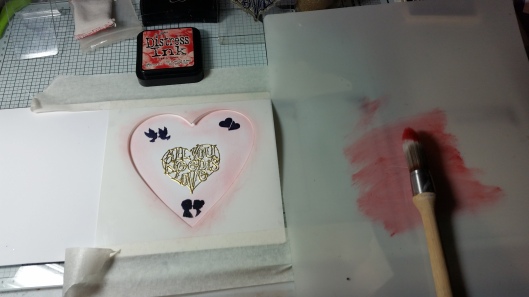
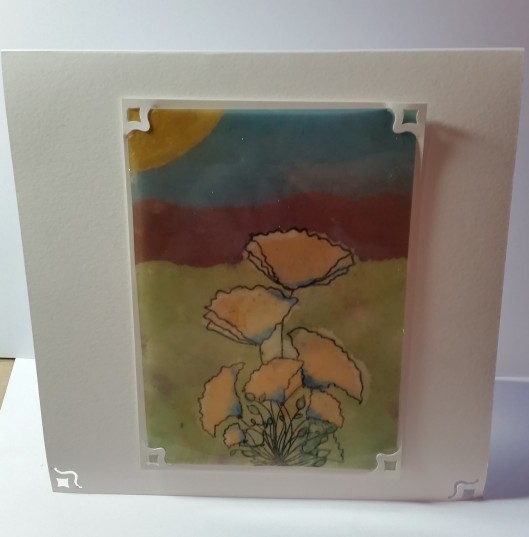
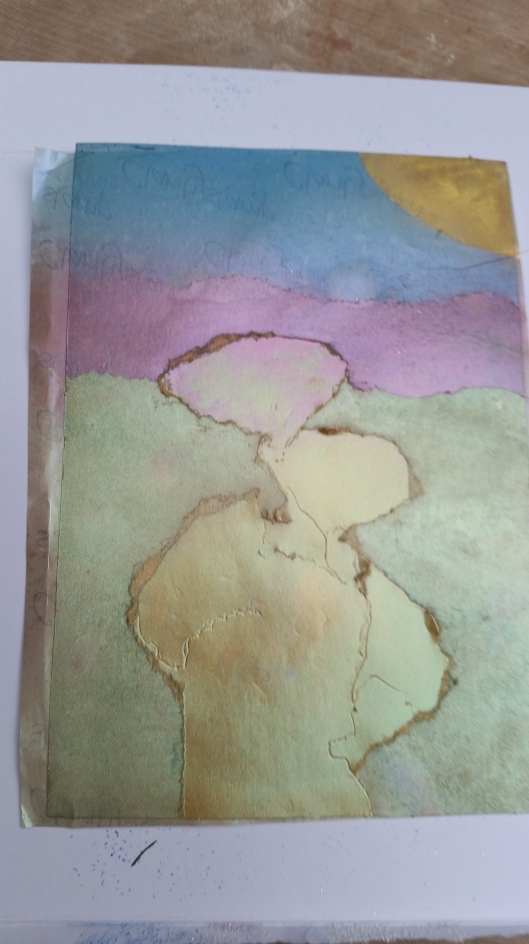
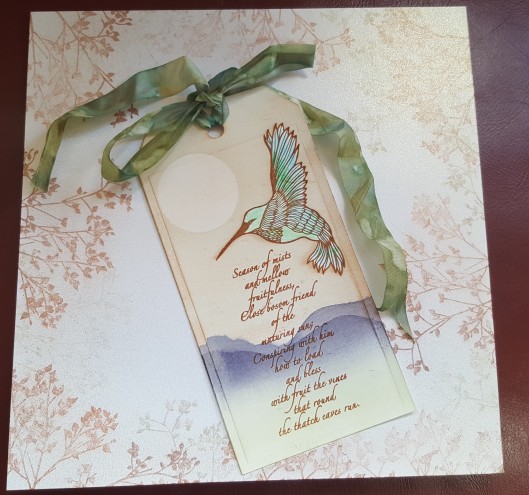
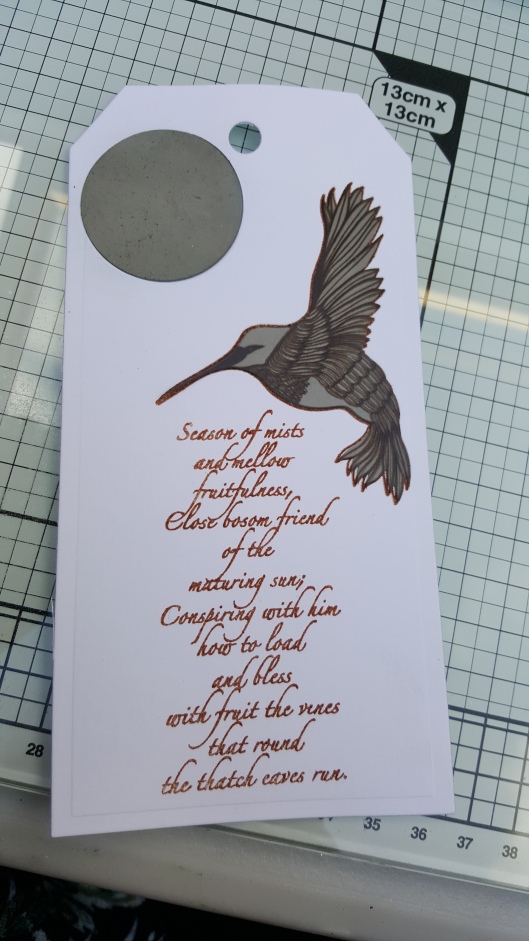
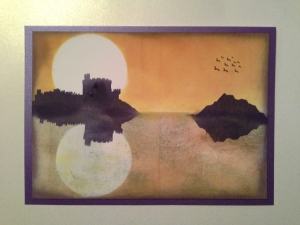
My project this month was a simple tag, using 3 of the masks, the mountain, one of the suns/moons and the humming bird. I the pictures of the step by step, the tag was a stamping card, my finished project was made using the Clarity Chromo card, which is super glossy.

I started with a plain white tag and stamped the verse with sepia archival ink

http://www.claritystamp.co.uk/Clear-Stamps/Verses-and-Words/4028-/Season-Of-Mists—Unmounted-Clear-Stamp

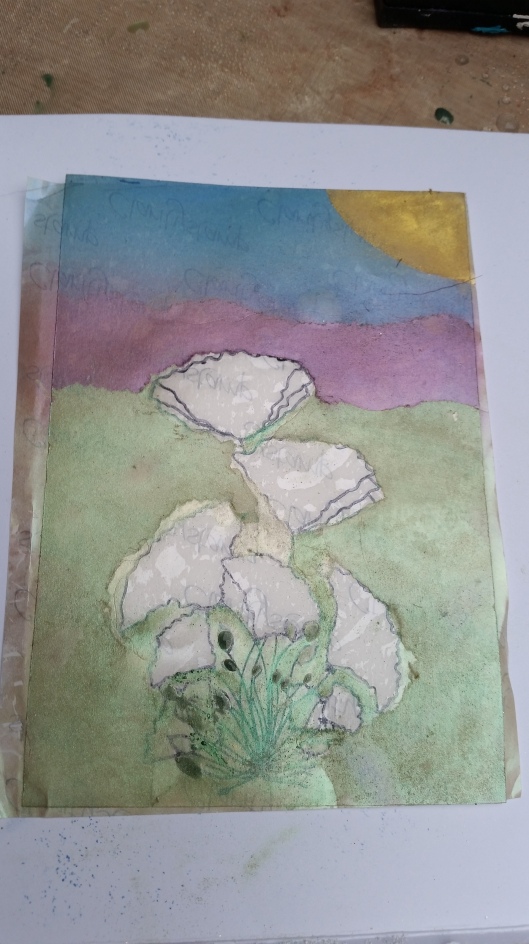
I then stamped the bird and covered with the mask and placed the moon mask in place.

2016-03-29 15.31.10

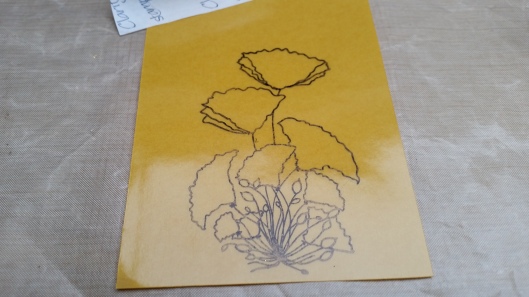
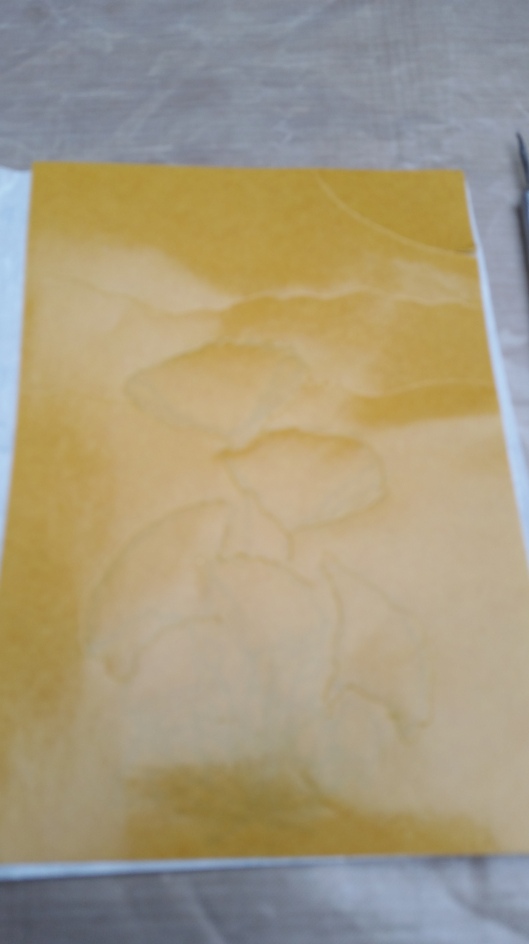
Next I gently using the Clarity blending brushes used a variety of colours adriondac inks to softly colour the tag’s background. I also placed the mountain mask over the tag and brushes some eggplant to create the illusion of hills. I wanted the illusion so softly does it.

2016-03-29 15.46.10.jpg

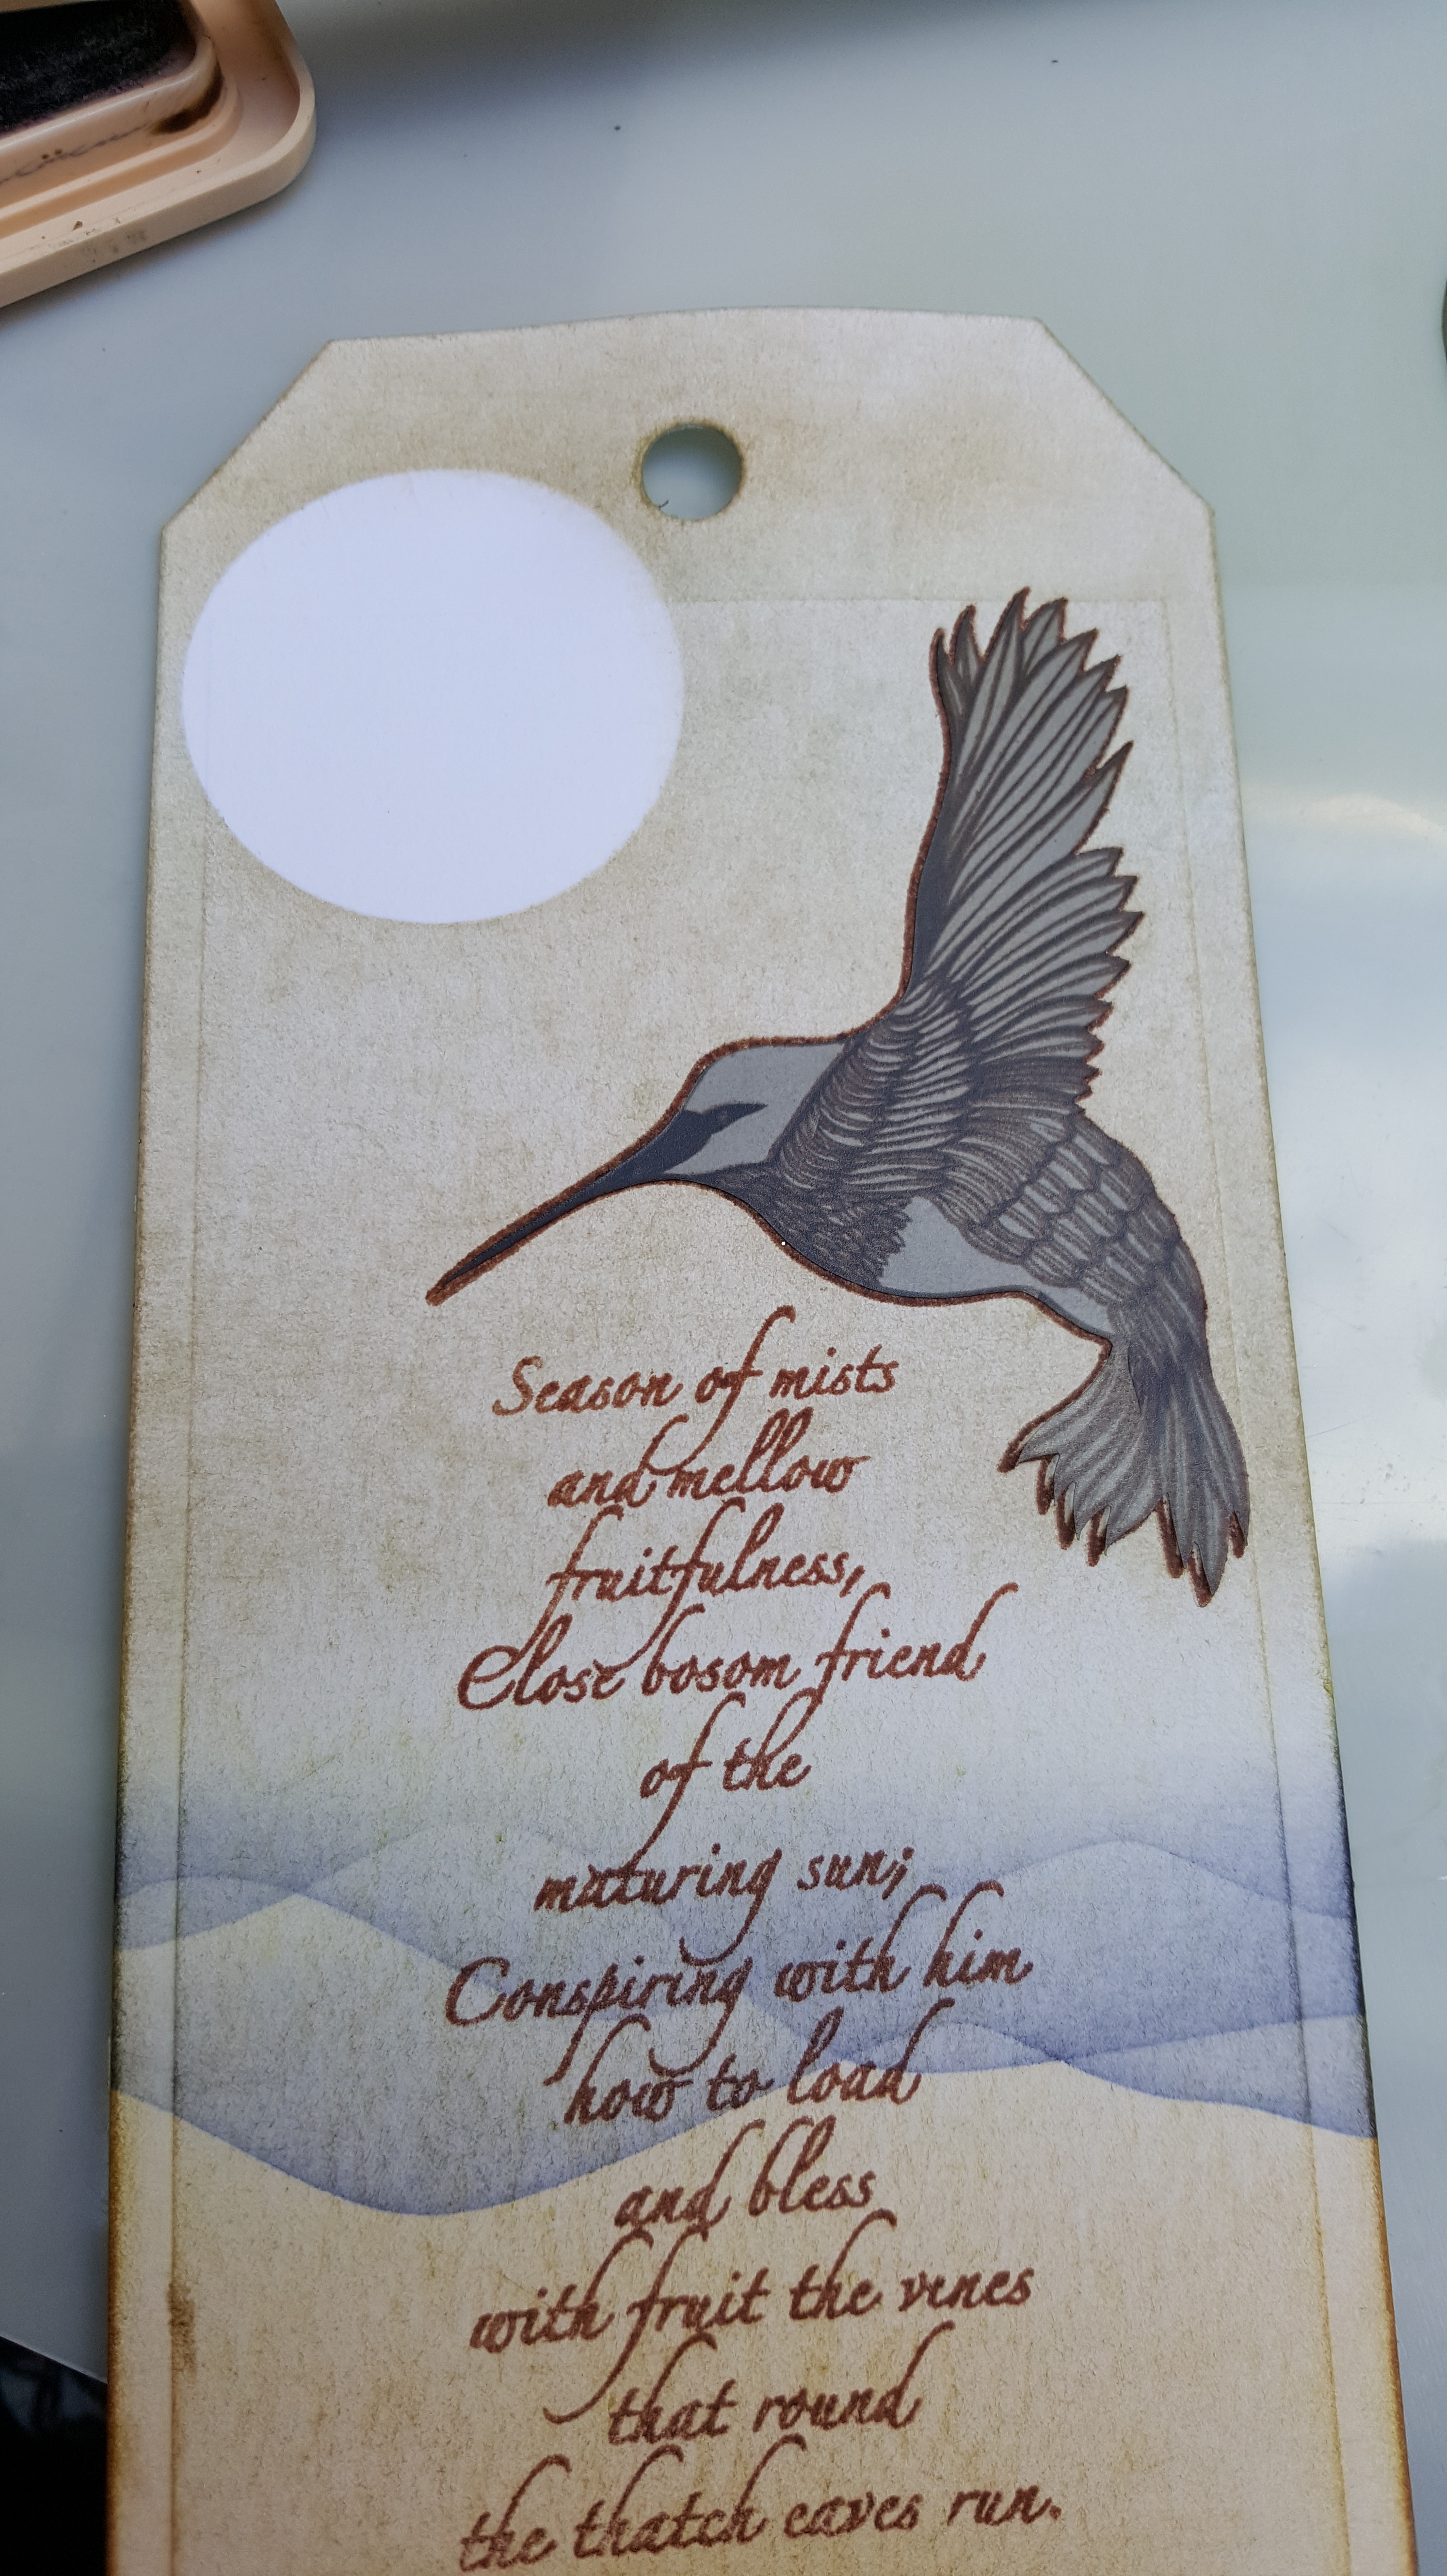
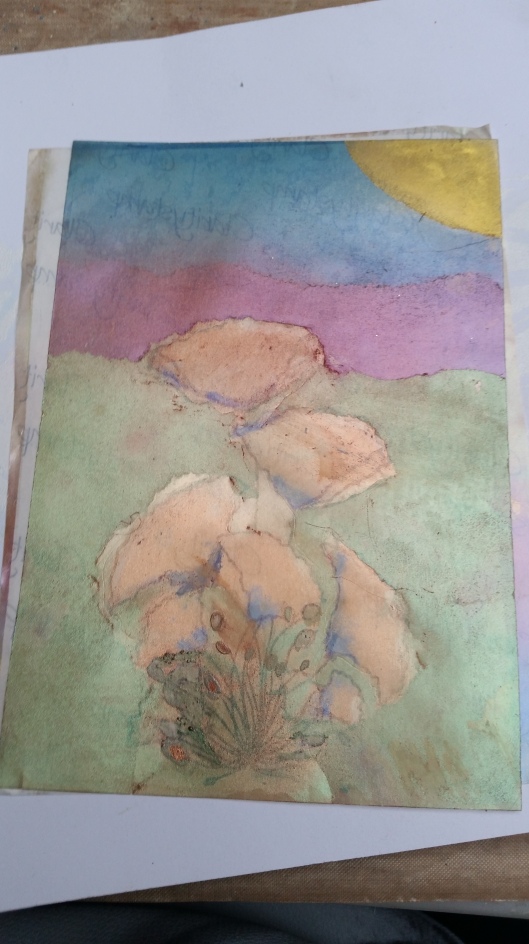
I then removed the sun/moon mask and used the other part of the mask you get the inside and the outside part of the masks, both of which can be used. I placed it over the sun and again using my brushes and peach bellini and coloured the sun slightly.

2016-03-29 15.47.402016-03-29 15.50.06.jpg

It makes a difference, I then removed the mask and coloured in the bird using water colour pencils and added a edge with promarkers and some hession for the bow.

2016-03-29 16.16.33

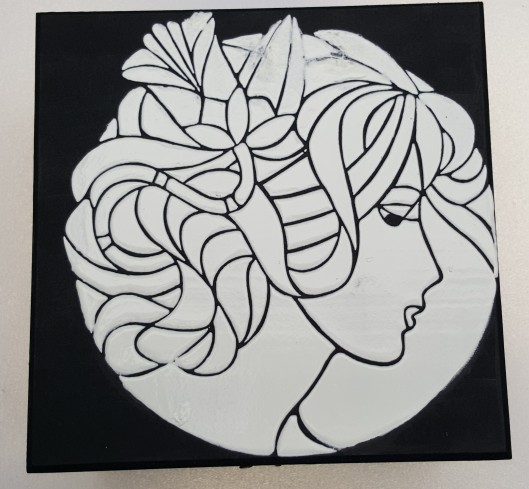
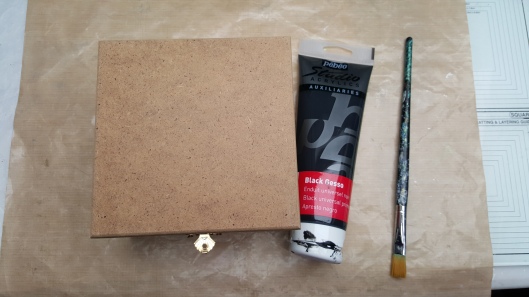
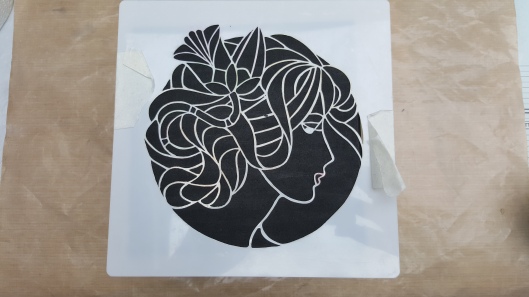
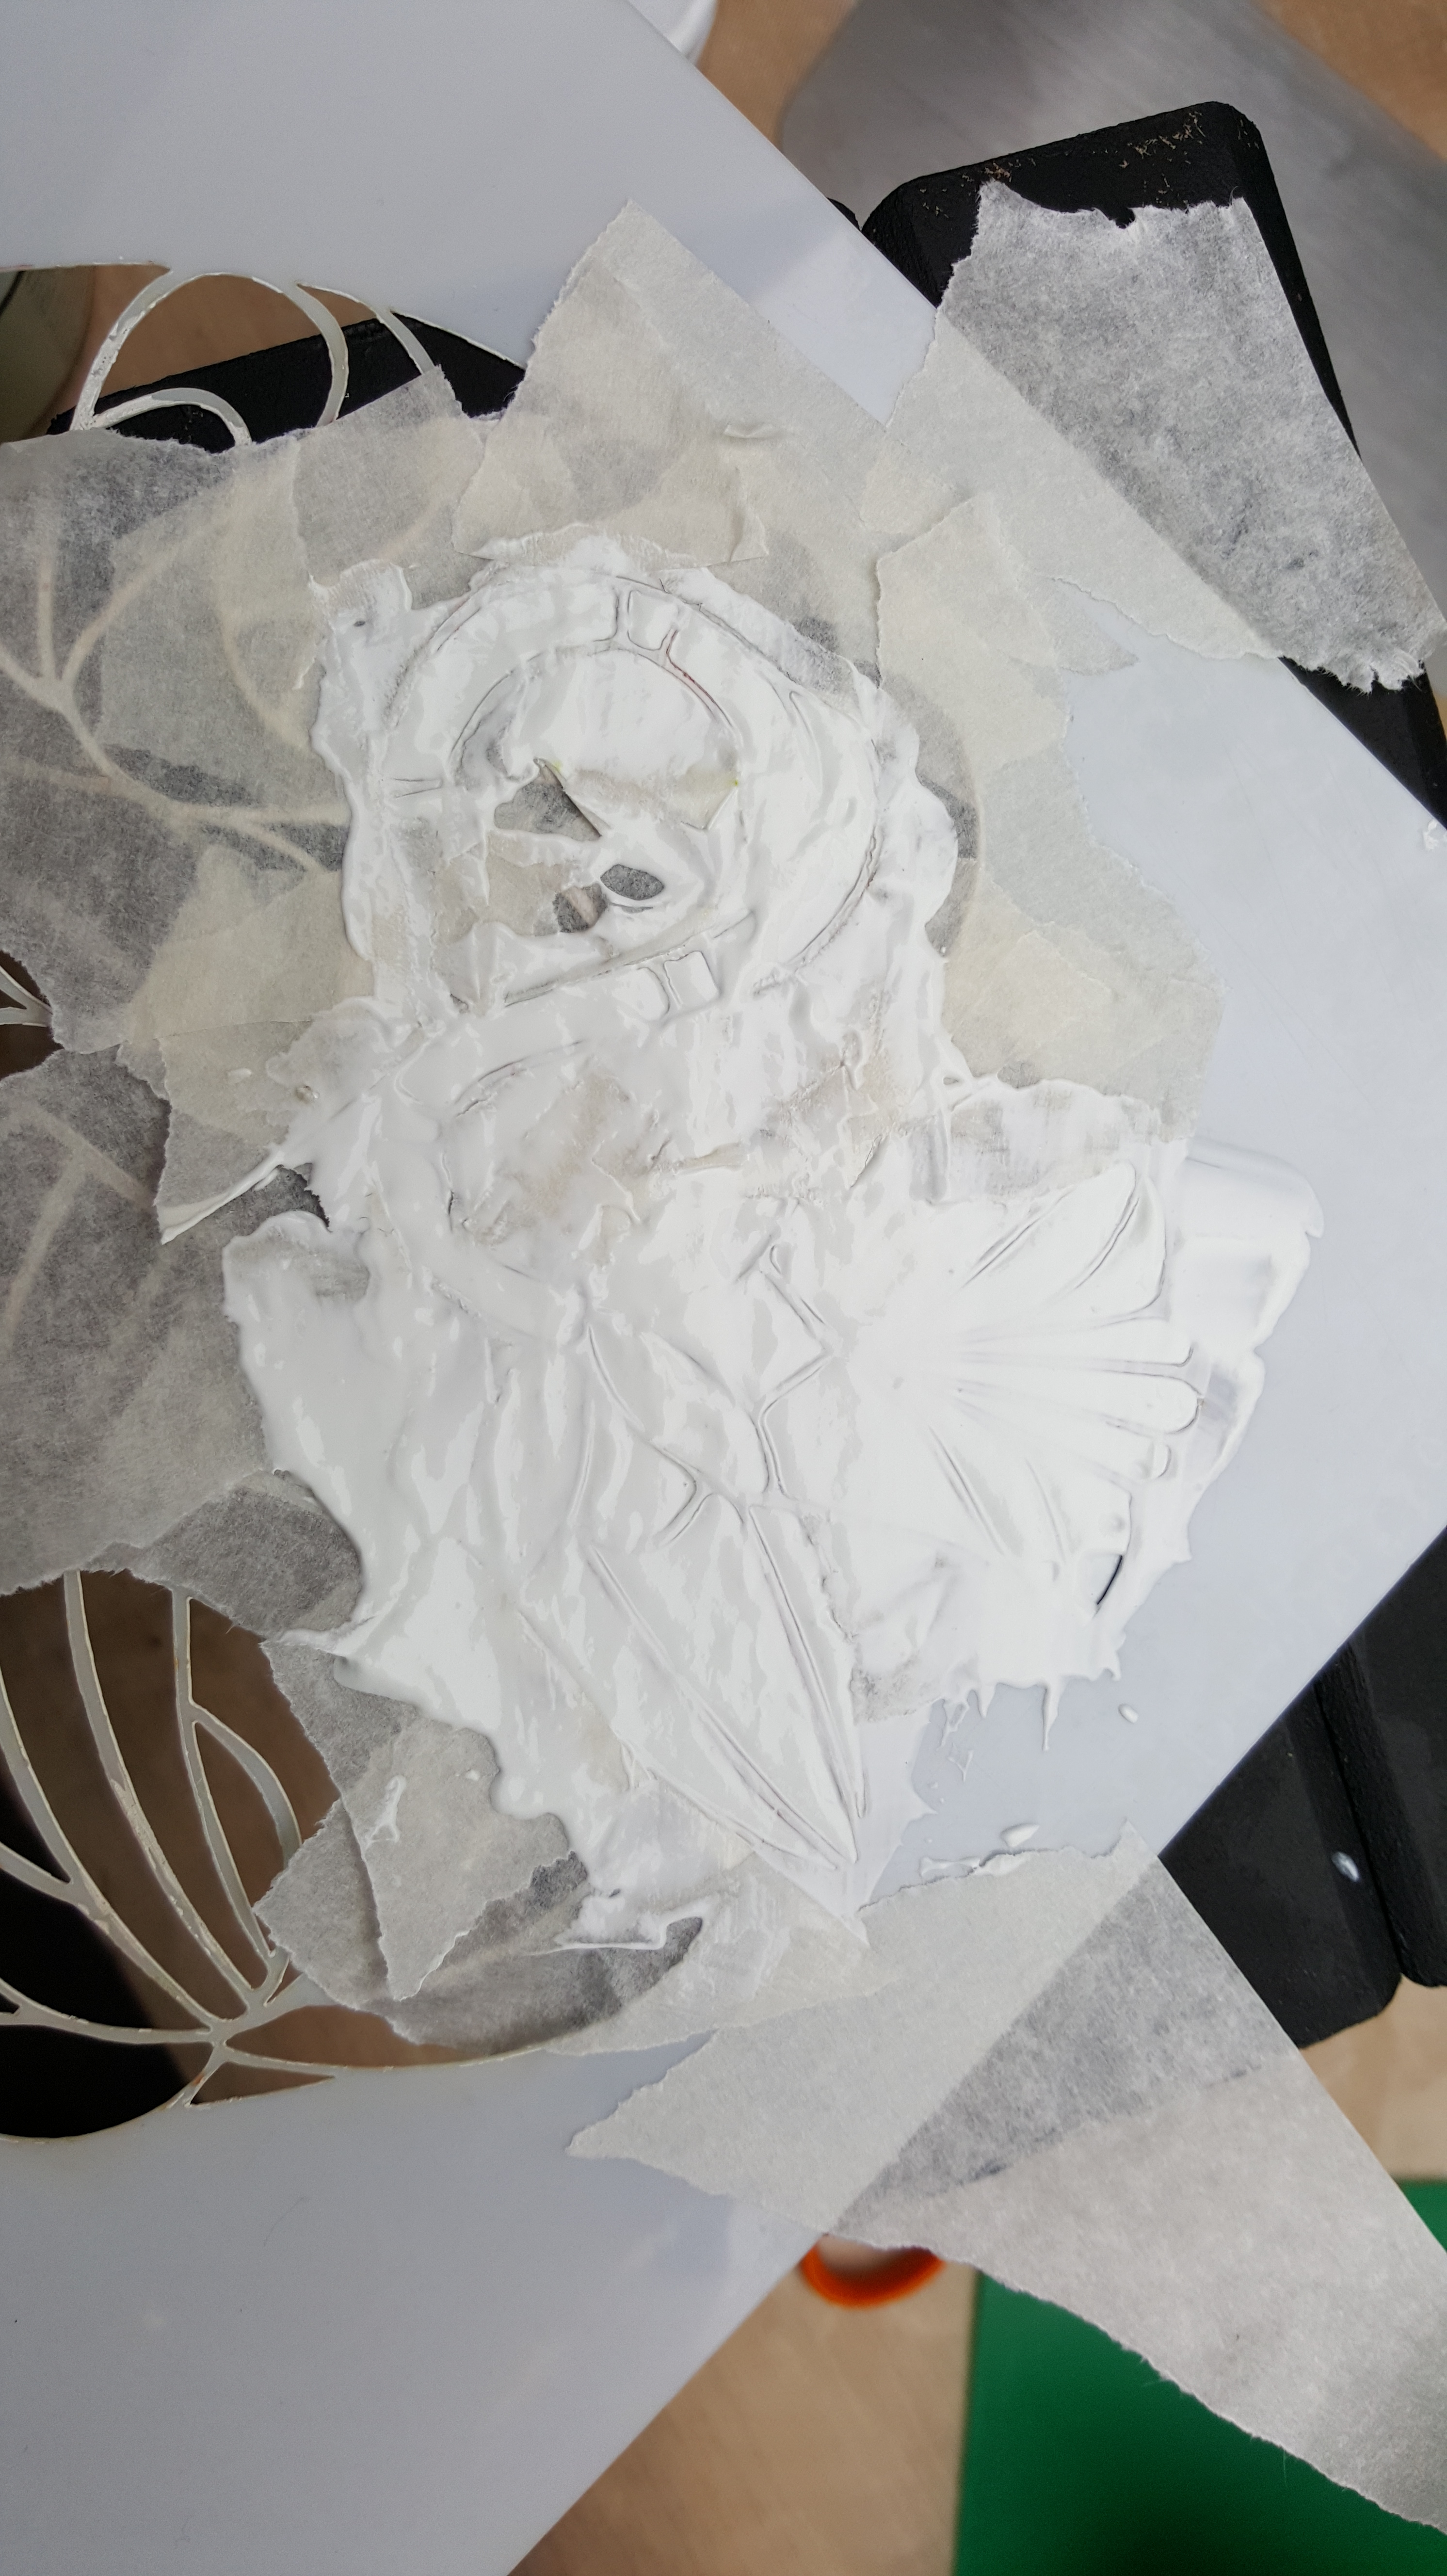
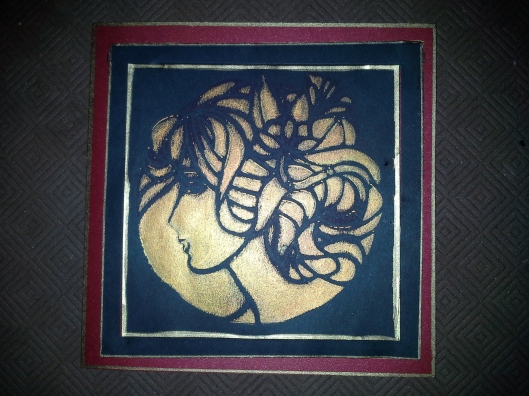
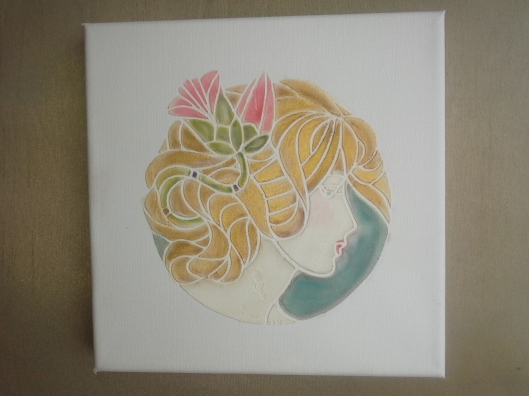
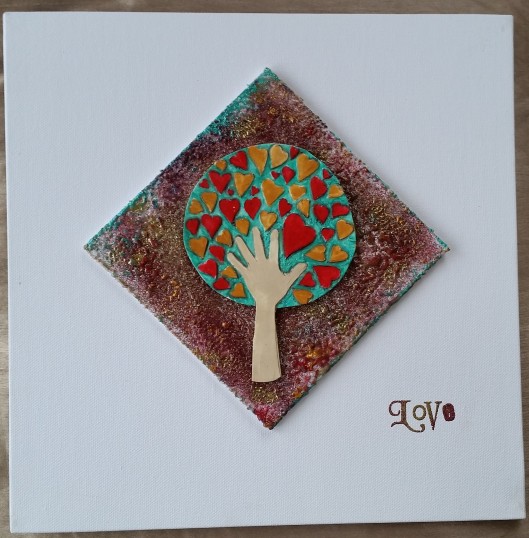
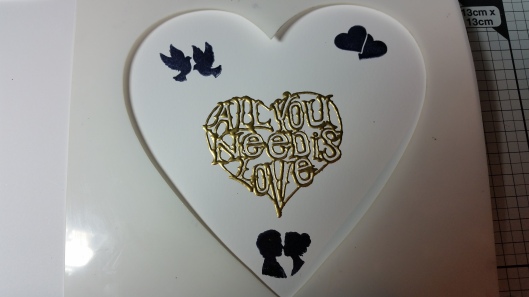
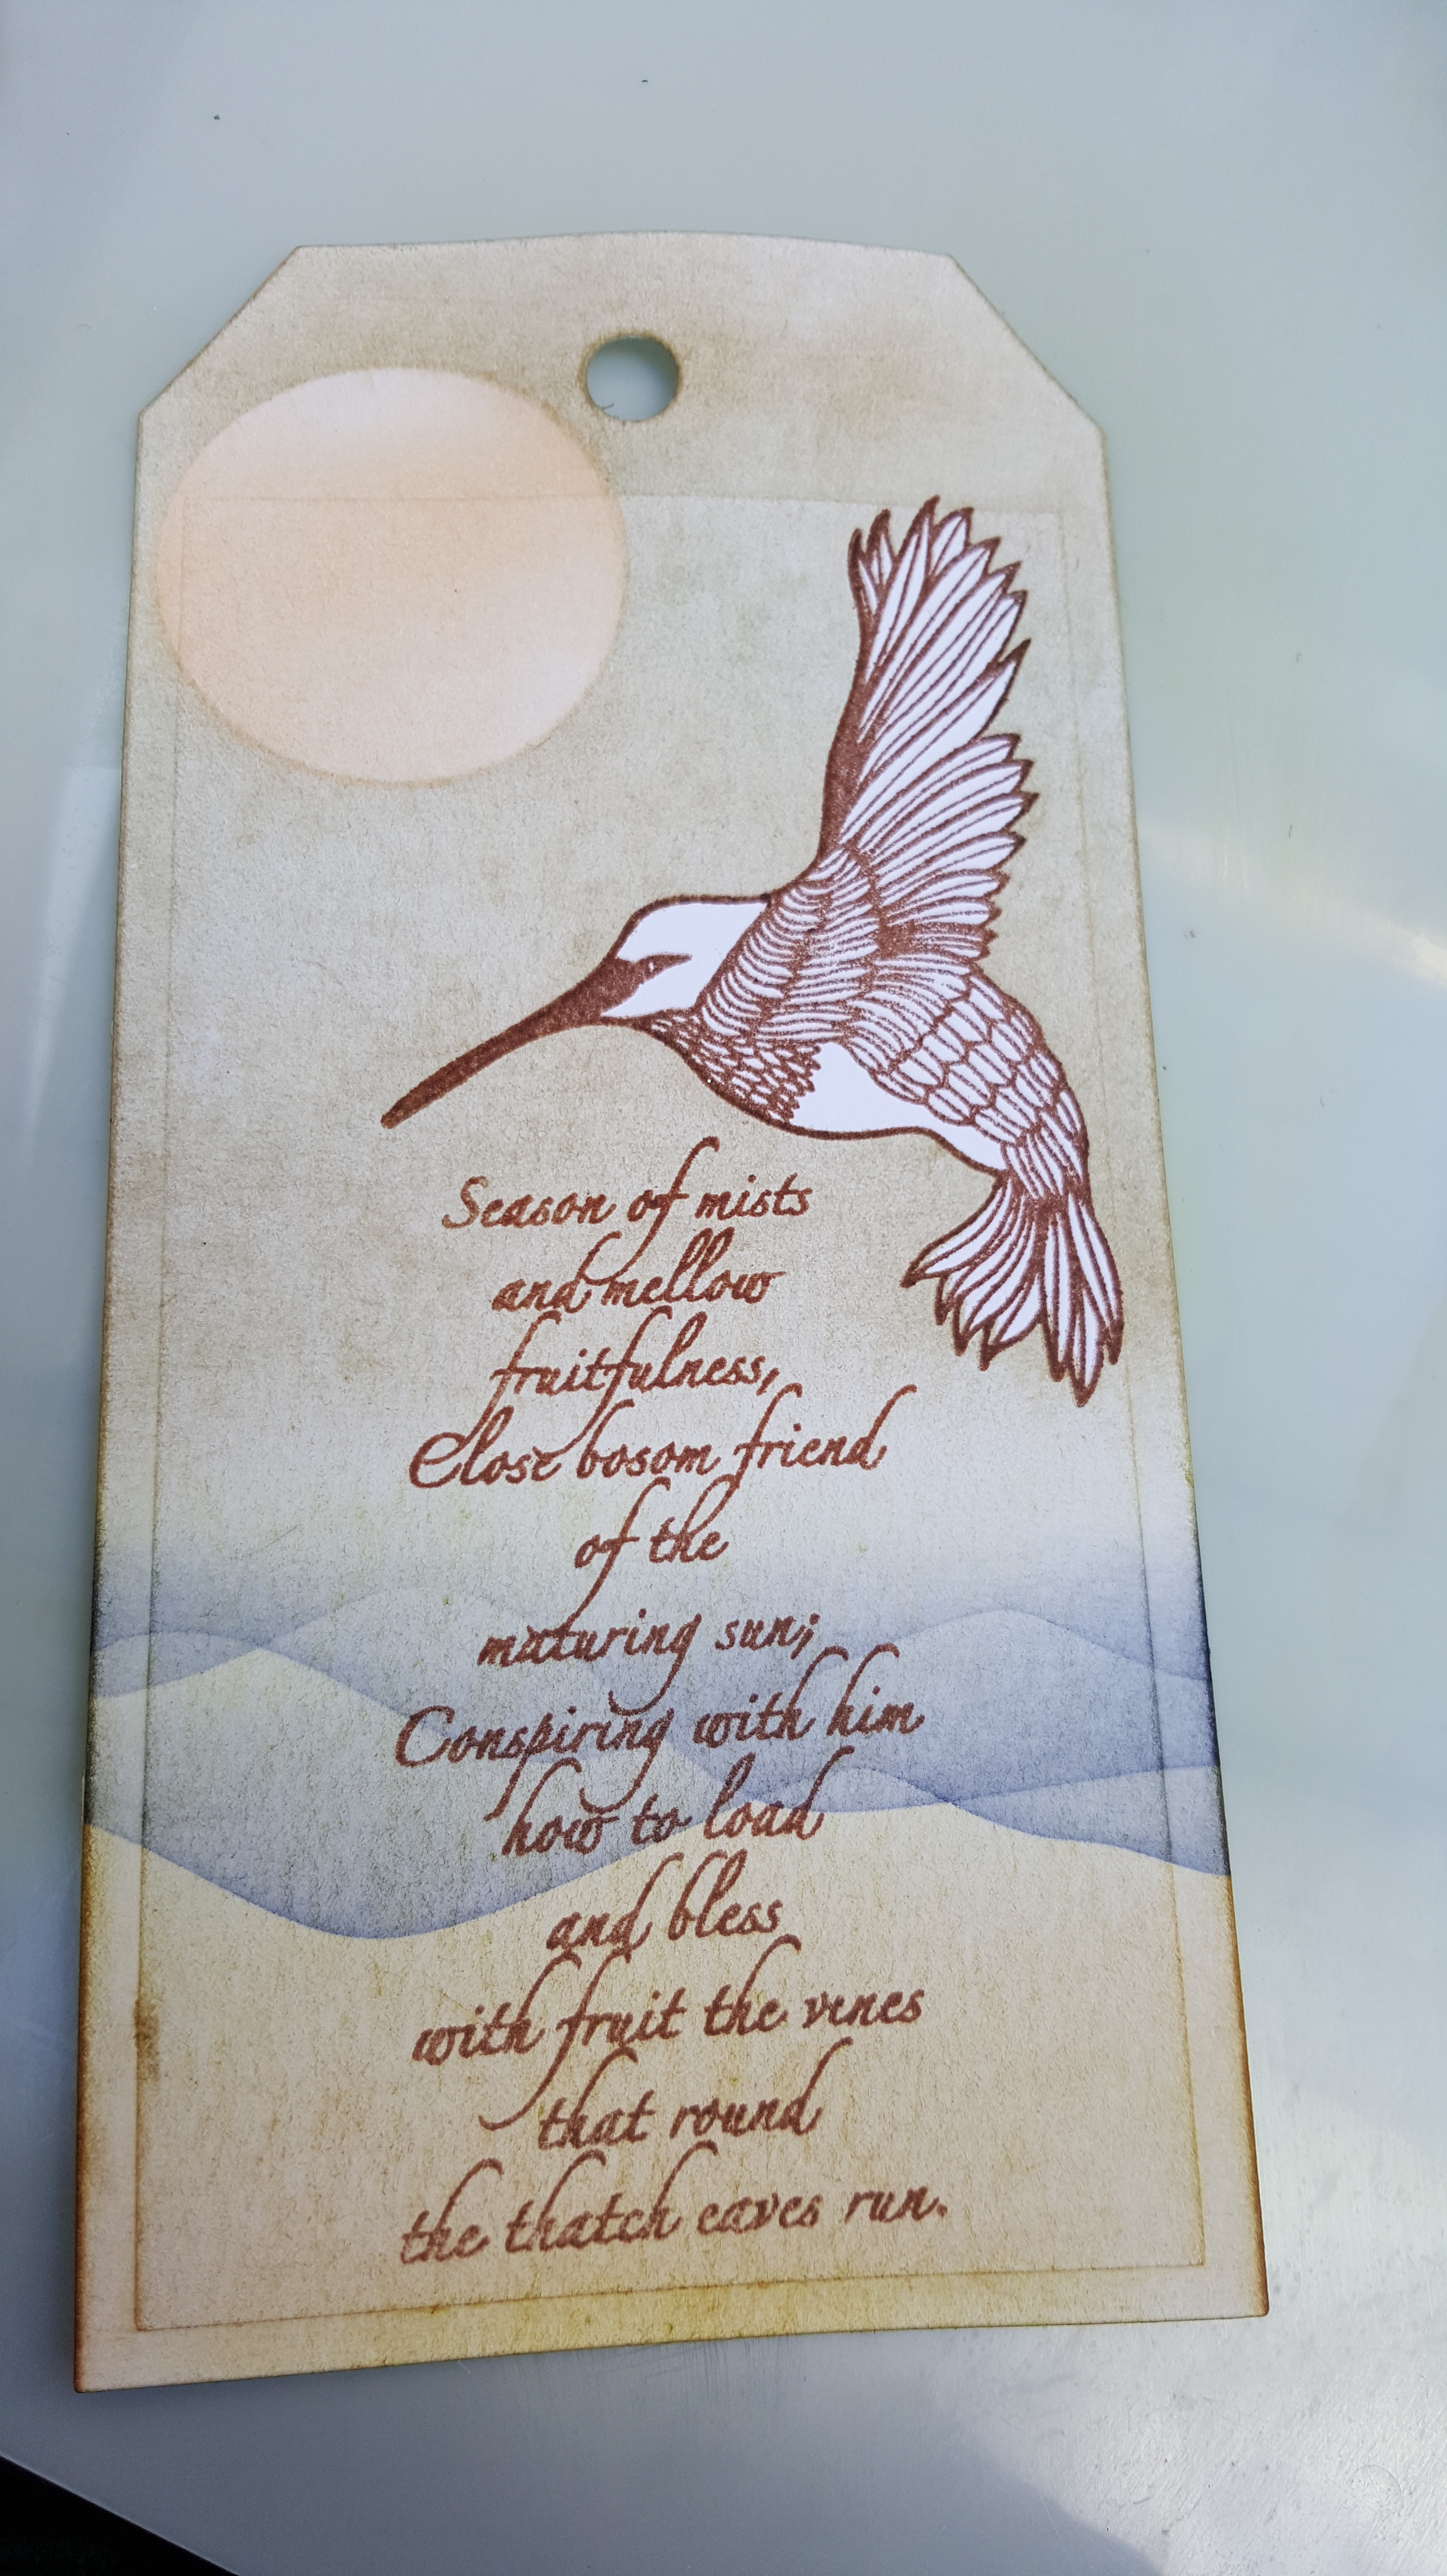
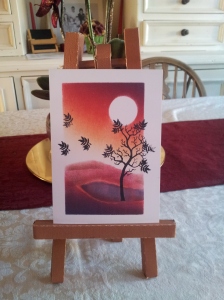
Some more masking examples

2014-11-23 20.22.00

2013-11-26 17.19.27

20120505_175719

Well that’s it for today.

Drop by the Clarity Blog and join in the fun.

http://claritystampchallenge.blogspot.ie/

Bye for now.

Naomi

It’s all about the girls

Tags

, , ,

Hi there,

Welcome to March and this month’s Clarity Blog Challenge is It’s all about the girls.

There is also a calender challenge so go on join in.

What a fantastic and amazing number of entries we had for last month’s Challenge. Congratulation to all who entered and thank you I really enjoyed as I know all the team did seeing your beautiful entries.  To see this month’s inspiration from the Clarity Challenge Blog Team drop in to the challenge at http://claritystampchallenge.blogspot.

We hope you will take part. Don’t forget it’s a £50 Clarity Voucher for the winner. Hope to see your artwork during the month.

20160229_160450


20160229_151521

Well my project this month started life as a paper mache box. I paint it with black gesso, two coats. I used two coats as it is very absorbment.

20160229_121825

I then taped the beautiful  Madeline Stencil into place on the lid.

http://www.claritystamp.co.uk/Stencils/14350-/Madeleine-Stencil-7-x-7-Inch

20160229_142959

Next I used a white gloss gel and gently spread it over the whole of the stencil, and then carefully lifted it off. It was perfect. I was then a little impatient when going to stencil the sides and touched to top on the box just as I was finishing hence the not perfect image on the lid.

For the side panels I masked off all wound the area I wanted to use in this case the flower and the stem and again passed the gel through the stencil. This is tricky as I was using a curved small area of the stencil.

20160229_145857.jpg

Leave to dry and then it’s finished.

As you will notice a little bit of touching up with back gesso, for one of two tiny bit of gel which when under the stencil. I had to take the pictures while the touch up was still drying. Well it has been a bit of a crazy month.

I love this stencil and using it in different ways.

Gold paste on black card.

2013-11-18 17.01.49

Here she is with grunge paste and Pan pastels on canvas.

2014-08-16 11.05.17

So hope you will experiment and enjoy every minute.

Bye for now.

Naomi

Love-Life is never going to be long enough

Tags

, , ,

2016-02-06 18.29.49

Hi there,

As you know this month’s theme at the Clarity Challenge Blog is Love.

I have been very inspired by this month’s design club sentiment stamp and stencil and

have combined the stamp and parts of the stencil here.

Hope you will join in this month’s Challenge and enjoy this inspiration.

Don’t forget to leave me a comment.

Love.

Naomi

Pan Pastels-learning by experimenting

Tags

2016-02-03 16.48.13

Hi there,

Just a quick blog.

I have had some pan pastels for a while and have played with them a few times. Yesterday afternoon I  had some me time and decided to play around like them on a canvas.

It’s far from perfect, but I relaxed and enjoyed it and learnt a lot.  So for me it was a success. I still have lots to learn and am looking forward to it.

Well better get the dinner on. Hope you enjoy it.

Bye for now.

Naomi

Love- well its the month for it

Tags

, , , ,

2016-01-30 15.31.22.jpg

Hi there I was saving this till later in the month, but decided that now was the time to

blog it.

The central element is a Clarity Stencil from January’s and I will blog a step by step if you would like me to, just let me know.

Hope you like it and it gives you some inspiration.

Bye for now.

Naomi

Love

Tags

, , , , , ,

Morning,

Hope it’s a good one for you.

Last month we had an amazing number of entries to the Challenge blog, thanks to everyone who took part.

The Calender Challenge was super, and a great number of entries for the start of this Challenge too.

The 1st of the month, so that means a new Challenge at the Clarity Stamp Blog Challenge, this month’s theme is love.

Hope to see you taking part in either of both Challenges. Don’t forget to see all by tan mates creations at http://claritystampchallenge.blogspot.co.uk/

This is my little card and I hope you like it.

2016-01-27 20.37.47

INGREDIENCE

2016-01-27 20.35.27

Stamps are: 

http://www.claritystamp.co.uk/New-Design-Club/New-Design-Stamp-Club-Back-Issues/15873-/NDC-88-All-You-Need-Is-Love-Backissue

http://www.claritystamp.co.uk/Clear-Stamps/Clever-Corners/5378-/Ornate-Corner—Unmounted-Clear-Stamp

http://www.claritystamp.co.uk/Information/Search/18041-/Wee-Folk-6-Wedding—Unmounted-Clear-Stamp-Set

Stencil is:

http://www.claritystamp.co.uk/Stencils/18620-/Vine-Heart-Stencil-7-x-7-Inch-from-NDSC8

2016-01-27 19.25.44

Take a 6 x 6 inch white card blank. Dust with an anti-static pad.

Using versamark stamp you image onto the centre of the card, cover with gold embossing powder and heat from underneath to get a smooth embossed image.

2016-01-27 19.42.08.jpg

Place the outer part of the stencil over the image making sure to position exactly and tape in place using low tack masking tape. Stamp your little images with black archival.

2016-01-27 19.46.13.jpg

I blended some of the red brick distress ink over the blending mat. Distress inks will bubble if you don’t blend them I then very gently sweeping from the sides brushed on the ink. Gently does it. Blend from the sided in to help give a fuller effect to the heart.

I next blended a little cloudy blue to the edges of the heart again to give some shadow again for that rounding effect. I then removed the stencil and very lightly used a soft pencil on the outer edges of the heart for shadow.

2016-01-27 20.37.47

Finally I used the ornate corner in each corner, using the same gold embossing powder, and coloured in the letters with a black distress pen and the inner heart with the red brick distress pen.

If you have any questions just leave me a message, love if you would leave me a comment.

Bye for now.

Naomi

Say it with Flowers Part 2

2016-01-18 16.47.12


Hi there,

Welcome to my 2 nd make for this month’s Clarity Blog Challenge which is say it with flowers.

We hope that the Clarity Team’s 2nd projects inspire you to join in. The Winner get a £50 voucher and it is good fun. Hope you see you there.

The link to the Challenge is

http://claritystampchallenge.blogspot.co.uk/2016/01/challenge-35.html

Here is my step by step if you would like to give this card of something similar a go.

Remove the white clarity sheet and keep to one side. Then stamp the double sided Clarity adhesive sheet with the poppy stamp and an archival ink Recover the stamped image with the white wax sheet.

2016-01-18 15.03.59

Turn the sheet over and carefully with a craft knife  score the brown sheet to make a sun, mountain and to trace around the flowers of the stamped image.

2016-01-18 15.10.54

Taking single section at a time, and using perfect pearls and a soft make up brush, brush the perfect pearls over the exposed glue.

2016-01-18 15.13.46

This is what it looks like after the background has been covered.

2016-01-18 15.35.44

In this case I brushed biscuit to highligh certain areas of the poppies where the light would hit it and a little blue for the shady areas. I also used a darker green on the small shoots.

2016-01-18 15.48.52

Next I rushed mandarin onto the flowers and gently rubber the back of the work with a soft tissue.

2016-01-18 16.00.46

Then i turned the artwork around removed the white wax paper and placed carefully the acetate sheet over the  the front of the piece.

I then mounted it on a piece of white clarity silk card and unto a

white 8 by 8 inch card.

2016-01-18 16.47.12

The Poppy stamp,perfect pearls, adhesive sheet and acetate sheet are available at

the Clarity Website at  http://www.claritystamp.co.uk.

Bye for now.

Naomi

Say it with Flowers

Hi there, good morning and Happy New Year to all.

This month’s Clarity Challenge is Flowers. I hope to some of your beautiful creations.

Drop in to the challenge blog and see my wonderful team mates creations. Don’t forget the winner get a £50 voucher and it is great to challenge yourself.

This is the website http://claritystampchallenge.blogspot.co.uk/

My card this month is a very simple one.

I used the rose stencil and put versamark through it with a sponge. I then heat embossed with white powder and coloured with pan pastels.

Simple but effective I think. I love it it’s so delicate.

I hope you like it and I look forward to sharing lots some crafting with you this year.

Bye for now.

Naomi

2015-12-28 12.15.39

Merry Christmas from our home to yours

Hi everyone,

Merry Christmas.

Sorry I have not I have not posted much this month, but have been unwell. Feeling a bit better now and hopefully on the mend.

I want to say thank you all those of you who have followed me this year and say thanks you so much.

Here are a few Christmas Cards, quick ones, I made this week and hope you enjoy them.


I wish you all a healthy, happy Christmas and New Year.

See you soon and bye for now

Naomi

A Christmas Story

Tags

2015-11-30 13.50.47

Hi there,

Sorry I have been unable to blog for a few weeks, but we have been having a little bit of a crazy time here.

Luckily things appear (touch wood) to be settling down at last. I am so happy to be able to get back to crafting.

Well today is the 1st December, and this month’s new Clarity Challenge is a Christmas Story, so hopefully you will join in all the fun and I will see your lovely creations. Remember a £50 voucher is the 1st prize.

Drop into see the inspiration from my Blog Design Team mates, they really lovely.

I also want to wish you and your family and loved ones and very healthy, happy and peaceful Christmas.

Thanks for all your wonderful messages and support this year.

Bye for now.

Naomi